Time/Depth Velocity Modeling: Menus
The Time/Depth Velocity Modeling menus let you access the tools needed to save time/depth calculations, and turn toolbars and dialog boxes on and off. There are a series of quality assurance tools found in the Tools menu that allow you to analyze your calculation, and generate additional curve and top outputs. Here, you will also find the option to create a velocity model, which can be used to convert seismic, horizon and fault data between time and depth.
Many of the options found in the menus are also available using the toolbar icons.
Time/Depth Velocity Modeling Menus
File
![]() New: Start a new time/depth conversion, and remove any existing layers from the Layers dialog box.
New: Start a new time/depth conversion, and remove any existing layers from the Layers dialog box.
![]() Load: Load
a saved time/depth conversion.
Load: Load
a saved time/depth conversion.
![]() Save: Save the current time/depth conversion. Any conversion that has
been
saved can be loaded at a later time.
Save: Save the current time/depth conversion. Any conversion that has
been
saved can be loaded at a later time.
![]() Save Well Data Points: Save the data for the currently selected layer to a text file.
Save Well Data Points: Save the data for the currently selected layer to a text file.
Exit: Close the Time/Depth Velocity Modeling application. The current calculation will be saved to a file, and restored the next time you open the application.
Edit
![]() Time/Depth Properties:
Open the Time/Depth Properties dialog box, used to define the gridding method and bounds for the calculations, and select the data to use in the calculation.
Time/Depth Properties:
Open the Time/Depth Properties dialog box, used to define the gridding method and bounds for the calculations, and select the data to use in the calculation.
![]() Copy: Save a copy of the currently selected layer, including the Layer Details selections, to the clipboard.
Copy: Save a copy of the currently selected layer, including the Layer Details selections, to the clipboard.
![]() Paste: Paste the copied layer in the Layers dialog box.
Paste: Paste the copied layer in the Layers dialog box.
![]() Delete: Delete the layer currently selected in the Layers dialog box.
Delete: Delete the layer currently selected in the Layers dialog box.
![]() Add
Layer: Create a new entry in the Layers dialog box. This entry will be blank, and you will need to make data selections.
Add
Layer: Create a new entry in the Layers dialog box. This entry will be blank, and you will need to make data selections.
Reset
All Layers: Restore
the original well information from the database and rerun the
calculation.
This will return any edited well data points to their original values,
and replace any wells that were previously removed from the calculation.
View
Large Icons:Turn large icons on and off.
Standard Toolbar: Turn the Standard Toolbar on and off.
Properties Toolbar:Turn the Properties Toolbar on and off.
Status Bar: Turn the Status Bar on and off.
Run/Convert Toolbar: Turn the Run/Convert Toolbar on and off.
Show Cross Plot: Turn the Cross Plot dialog box on and off.
Show Grids: Turn the Display Grids dialog box on and off.
Show Well Data: Turn the Well Data Points dialog box on and off.
Show Detailed Properties: Turn the Layer Details dialog box on and off.
Show Velocity Histogram: Turn the Velocity Histogram dialog box on and off.
Show Time Histogram: Turn the Time Histogram dialog box on and off.
Show Depth Histogram: Turn the Depth Histogram dialog box on and off.
Show Well Statistics: Turn the Well Statistics dialog box on and off.
Revert to Default View: Return all of the dialog boxes to their default positions.
Tools
Status
Report: After
running a time/depth conversion, this
will create a report detailing
how the conversion was performed, and the extents of the grids that were
produced.

Output Tops: Save the velocities or the misties at the wells as tops. The output tops need to be saved separately for each layer. After selecting a layer, enter a Name, and optionally enter a Source. Select the Output type, and the overwrite behavior.

Generate Velocity Curves: Generate a velocity curve for each well based on the results of the calculation. This can only be done when you are performing a calculation on multiple layers. Enter a Velocity Curve Name, optionally enter a Source, and then specify whether or not you would like the curve to become active. When no curve exists for a well, the generated velocity curve will become the active curve. By default, the wells used in the calculation will appear in the Selected list, however you can select additional wells.

Generate Stretch/Squeeze Velocity Curves: Generate a velocity curve for each well that has been stretched/squeezed using the time horizon and formation top pairs in the Layers dialog box. A shift is applied to the generated velocity curve based on the shallowest horizon/top pair, and then the remaining pairs are used to either stretch or squeeze the velocity curve so that the formation top is placed at an equivalent depth to the time horizon. Enter a Velocity Curve Name, optionally enter a Source, and then specify whether or not you would like the curve to become active. By default, the wells used in the calculation will appear in the Selected list, however you can select additional wells.
Generate Velocity SEG-Y Files: Generate a SEG-Y velocity model for each of the seismic lines that were used in the time/depth conversion. Enter a File Description, Type, Version, and select an Output Folder. You can optionally add the file to your working set, but this is not recommended. This model can be used in the Time/Depth Conversion application to convert seismic data, horizons, and faults between time and depth.

Generate Velocity Model: Generate a velocity model for each of the seismic lines that were used in the time/depth conversion. Enter a Name, and Description, and then turn on Make Active to make it the default velocity model. A list of saved velocity models is available in the Time/Depth Properties window, which can be opened from the Time/Depth menu on the Main Launcher.

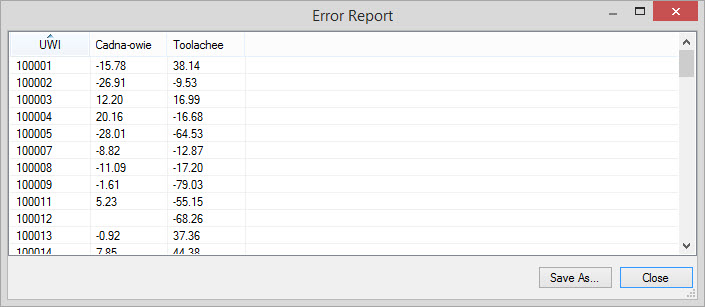
Generate Errors Report: Generate an error report that list the residual between the original depth grid value for a well, and the depth grid value when the well is removed from the calculation. This report is generated by running repeated time/depth calculations, each time removing a single well from the calculation. This will take a long time to produce if your calculation uses a lot of wells.
Enable Automatic Calculations:
When this is turned on, the time/depth calculation will be performed
every time you make a change in any of the dialog boxes. When this is
turned off, you will need to run the calculation every time you make a
change to the inputs. A warning symbol (![]() ) will appear next to any layer that has out of date information. Click the Run
Layer icon (
) will appear next to any layer that has out of date information. Click the Run
Layer icon (![]() ) to
rerun the calculation for the selected layer, or click
) to
rerun the calculation for the selected layer, or click  to run the
calculation for all layers.
to run the
calculation for all layers.
Also See
— MORE INFORMATION

|
Copyright © 2020 | SeisWare International Inc. | All rights reserved |