Fault Properties: Menus
The Fault Properties menus
let you access editing tools, including copying fault, and let
you open additional applications to help manage and manipulate your faults. Most options available in the Fault
Properties can be accessed by right clicking in the table and selecting from the shortcut menu, or by
using the toolbars.
Fault Properties Menu Options
File
Import: Launch the Fault Import window.
Export: Launch the Fault Export dialog.
Save As: Save the Fault Properties table to a text file.
Print: Print the Fault Properties table.
Print Preview: Launch the Print Preview for the Fault Properties table.
Print Setup: Launch your printer dialog.
Exit: Close the Fault Properties.
Edit
Activate: Change any selected faults to become active. Only active faults will appear in other windows and dialogs.
Inactivate: Change any selected faults to become inactive. Only active faults will appear in other windows and dialogs.
Delete: Delete the currently select fault or faults. A dialog will pop up to confirm that you wish to delete the faults. You can also delete faults by selecting them and hitting the Delete key.
Delete Triangles: Delete the triangles (surfaces) for the currently selected fault or faults. Fault segments will remain unaffected. A dialog will pop up to confirm that you wish to delete the triangles.
Copy: Copy the currently selected faults to an internal buffer for duplication using the paste function. This function can also be accessed using the hot key combination Ctrl+C. This is very useful when you wish to perform some test edits on a fault without modifying the original fault.
Paste: Paste the faults copied with the copy function into the project. Faults will be named "Copy of ...". For example if you copy and paste fault Red the copy will be named Copy of Red. This function can also be performed using the hot key combination Ctrl+V.
Rename: Make the name of the currently selected fault editable. Edit the name in place and hit return to update the fault. A single fault must be selected. You can also rename a fault by double clicking on the name of the fault.
Save As Filter: Create a filter based on the selected faults
Select All: A quick way to select all the faults. This function can also be performed using the hot key combination Ctrl+A.
View
Invert Selection: Invert the
currently selected items in the properties window. If an item
is
selected it will be deselected, and if an item has not been selected it
will be selected. This is useful when trying to hide all but
a
few items. Click the items you want visible, invert the
selection
and then click the Make Hidden menu item.
Refresh: Reload
the list in
the properties window. It may happen that this list is not up
to
date. Using this item will update the list. This
can also
be accessed using the F5 hot key.
Properties Toolbar/Toolbar/Status Bar: Turn these on and off to display the respective toolbars.
Displayed Columns: Open the Set Displayed Columns dialog box and select the columns that you want to appear in selection lists throughout the project. Note: If you select the Color column for display you can change the color of the fault directly from the selection list by clicking on the color box.
Tools
Pick: Launch the Pick Faults dialog.
Data Filters: Launch the Data Filters window.
Triangulate: Launch the Fault Triangulation window.
Polygons/Contacts: Launch the Fault Polygons/Contacts generation tool.
Import: Launch the Import Faults window.
Export: Launch the Export Faults window.
Shortcut
The shortcut menu can be accessed by right clicking in the table area of Fault Properties. You can access most fault functionality from this menu.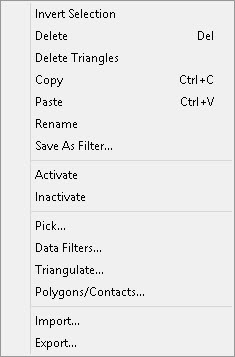
Also See
— MORE INFORMATION

|
Copyright © 2020 | SeisWare International Inc. | All rights reserved |