Defining Columns in Columnar ASCII Files
Columnar ASCII files can be used to import wells, horizons, faults, and culture, as well as when gridding and cross plotting XYZ files. In all cases you will be required to define the columns.
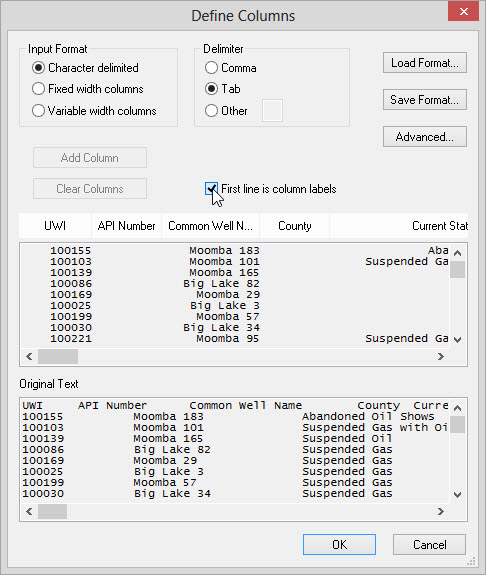
To begin the process you must first press the  button. When the Define Columns dialog opens you will immediately see
the Original
Text
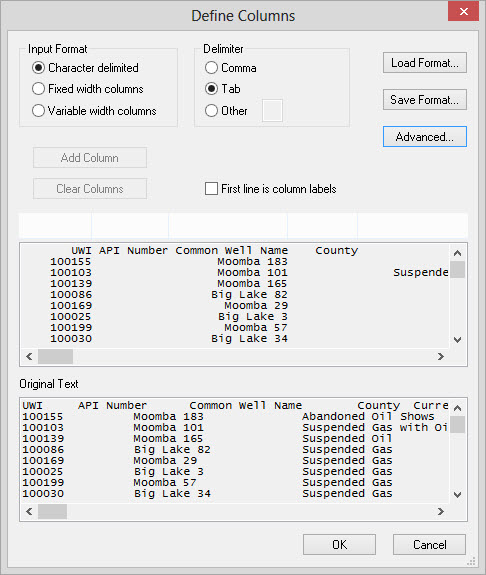
display in the lower text box. The data that will eventually be
imported, or used in a process, will appear in the upper data box,
which must be set up before you can
continue.
button. When the Define Columns dialog opens you will immediately see
the Original
Text
display in the lower text box. The data that will eventually be
imported, or used in a process, will appear in the upper data box,
which must be set up before you can
continue.
How do I define the columns in a columnar ASCII file?
-
Use the Advanced Parameters Dialog to remove any unnecessary header rows.
-
Select the Input Format and:
-
Define the columns:
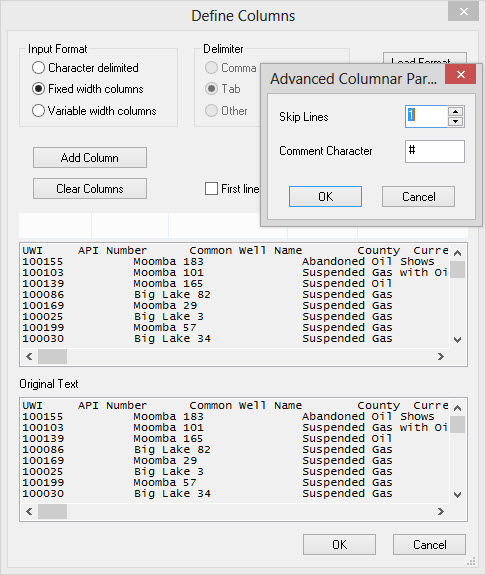
Using the Advanced Parameters Dialog
Use the Advanced button to if you need to remove header rows from the
data to be imported. Often an import file can contain descriptive
information at the top which can be removed from the file without
having to edit the file in a different program. To import
correctly, the first line that is read must contain values for import.
-
Press the
 button.
 -
Enter the number of lines to skip at the top of the file. In some cases you may wish to leave the column labels visible to help when defining columns, or if you want to use the First line is column labels toggle. Alternately you can enter a Comment Character whereby any row which is preceded by the specified character will be ignored and will not appear in the data box.
Select the Character delimited input format.
Select the Delimiter. This is either Comma, Tab, or Other.
With this set properly you should now see all of the columns in the
data box lining up below the column header buttons.
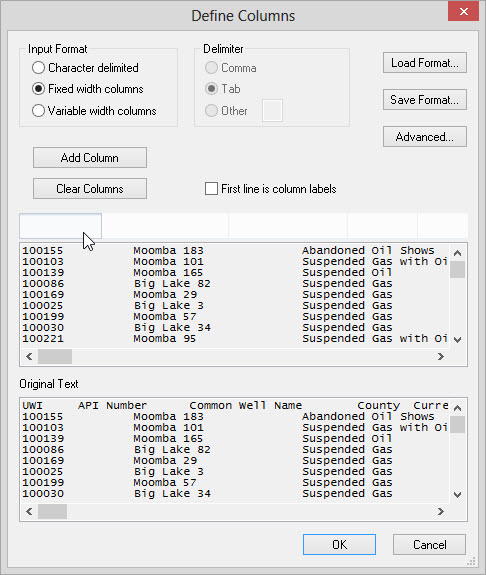
Variable Width Columns
In some cases using a character delimited format won’t work
and
you must use either Fixed width
columns or Variable width
columns.Notice that when either of these is selected the Delimiter
field will become grayed
out because these options are no longer necessary.
Defining Columns
When all the data columns have been lined up you can define the
columns. There are two options when defining columns:
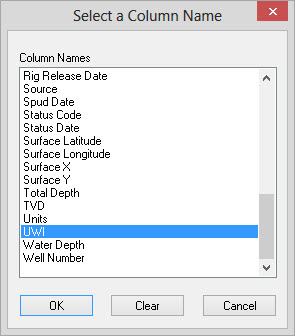
Option 1 – Manually Define Columns:
- Left click on the header
button.
- Select from the list of
available Column Names. In some cases,
like when importing horizons or tops, you will have to type in the
name, or select it from the drop down
list.
-
Press
 .
. -
Continue defining columns until all of the columns of data that you want to import are defined. If any column is NOT defined the data contained within it will be ignored in the loading process.
-
If you have mistakenly labeled a column left click on the header and press
 .
.
Option 2 – First line is column labels:
- Place a check mark next to
First line is column labels. The
column headers will be populated with the header information
from the
import file.
-
If you want to remove any labels simply left click on the header and press
.
Note:
When using the First line is column
labels
option double check all of the Column
Names.
If the name in the
original file is not recognized by SeisWare it will not be used to
populate the field. In addition if you are importing horizons or tops
the column label must match exactly what is already in the project in
order for it them be considered the same item. Changing a top name to
match what exists in SeisWare already is a good way to avoid top
duplication.
Saving Format Files
Saving format files is useful when you are always receiving information
from the same source, and the import files are always being saved the
same way. The Fformat file will save the Input Format, Delimiter, Advanced
and Column Header information replicating the saved format.
A format file can also be as a starting point if you have a similar but
not identically formatted file. After the format file is
loaded further manipulations can be done.
- To create the format file,
after setting up the columns but
before exiting the dialog press
 .
.
- To use the format file,
before starting any formatting press
 .
.
Finishing
- Click
to close the Define Columns dialog.
— MORE INFORMATION

|
Copyright © 2020 | SeisWare International Inc. | All rights reserved |