Getting Started: Seismic Viewer
How do I generate a synthetic track?
Open the Generate Synthetic Dialog
There are two methods for opening the Generate Synthetic dialog box:
Click the Generate Synthetic Track icon
 on the Well Toolbar.
From the Well menu select Generate Synthetic Track.
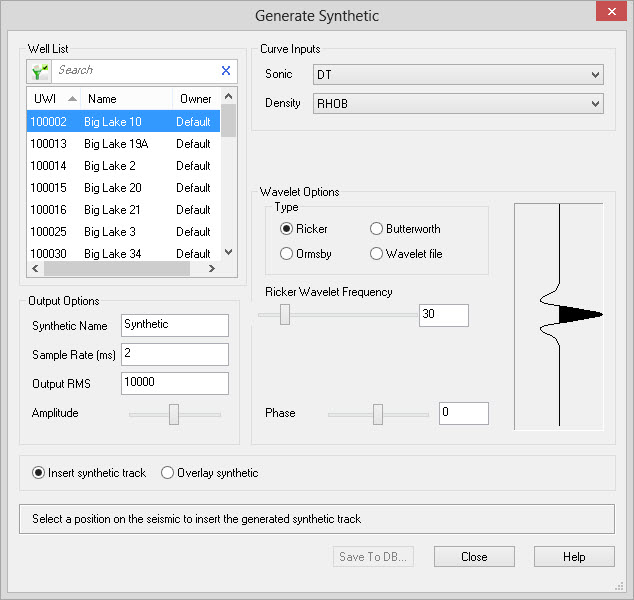
Insert the Synthetic Track
Select the well from the Well List or click on the well symbol in the Seismic Viewer or on the Basemap.
Select the Curve Inputs you would like to use, for both the Sonic and Density options.
Insert the synthetic by placing the cursor on the seismic section and clicking.
- Edit the appearance of the curve in the following ways:
- Shift the synthetic by clicking the Bulk Shift icon (
 ) and dragging to curve to a new location.
 - Change the Output Parameters, Curve Inputs, and Wavelet Parameters to see the changes on the generated synthetic.
- Shift the synthetic by clicking the Bulk Shift icon (
Click
 .
.
Improve the Synthetic Tie
Click the Stretch/Squeeze icon (
 ) on theWell Toolbar. This will launch the Graphical Stretch/Squeeze dialog box.
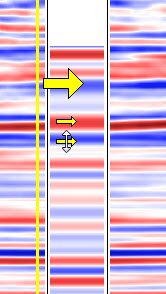
Left-click to place the large anchor arrow .
With the left mouse button depressed use the small arrow to stretch or squeeze the synthetic between the arrows.
Use the
 button to save the changes made to your velocity curve. This curve will now become your active velocity curve.
— MORE INFORMATION

|
Copyright © 2020 | SeisWare International Inc. | All rights reserved |