Data Loader: Input 3D SEG-Y Files
Use the Input SEG-Y Files page to specify the 3D SEG-Y files that you
wish to
load unless you are loading from a tape.
Only one 3D survey can be loaded at a time unless you are loading from a columnar ASCII file.
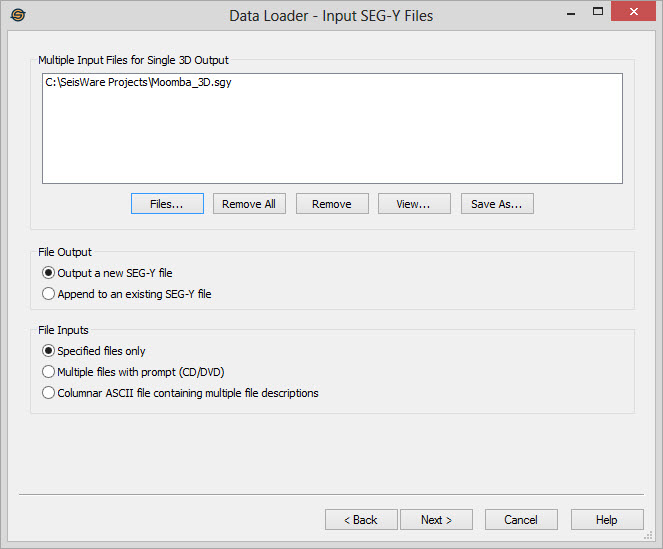
Multiple Input Files for Single 3D Output
Specify the input files to load. Only a single 3D file is
output
so the files should all be for the same survey. In addition
the
files should be in the correct order, from lowest line number to
highest line number.
 Files:
Pop
up a file selector dialog to select files to import.
Files:
Pop
up a file selector dialog to select files to import. Remove
All: Remove all files from the list.
Remove
All: Remove all files from the list. Remove: Remove
any currently selected files from the
list.
Remove: Remove
any currently selected files from the
list. View: Opens the
currently
selected file in the Seismic Viewer.
View: Opens the
currently
selected file in the Seismic Viewer. Save As: Save
a list of all
the input files to a .csv file. This .csv file can then be edited to
include unique load parameters for each file. Use this to load multiple
3Ds to individual output 3Ds.
Save As: Save
a list of all
the input files to a .csv file. This .csv file can then be edited to
include unique load parameters for each file. Use this to load multiple
3Ds to individual output 3Ds. File Output
Specify how the output file should be created.
Append to an existing SEG-Y file: This will append the input files to an existing 3D survey. If you have the data available it is best to create the output file in a single load rather than using this option.
File Inputs
Specify the source of the files to load.
Multiple files with prompt: Use this option if you have multiple CDs or DVDs with different pieces of the survey. After loading each piece the data loader will prompt you to select the next file. Even when loading from CD it is often easier to copy the files to your local drive and specify them all at one time.
Columnar ASCII file containing multiple file descriptions: Use this option to load multiple 3Ds at a time. Do not select any input files, and then click Next to set up the options on the Load Columnar File page.
— MORE INFORMATION

|
Copyright © 2020 | SeisWare International Inc. | All rights reserved |