Once data has been added to a scene, place a check mark next to the individual data items or data folders that you want visible in your scene, and remove the check mark from items or folders you don't want visible. Select any data item in the tree to adjust its properties in the Object Properties dialog box.
To rename a folder, double click on the folder in the scene tree and then enter the new name in the text box. Note that you can't change the names of data items using this technique.
Scene: When selected, you can adjust the properties of the main display window, including the background color, highlight color, scale, and lighting angles, as well as define an area of interest. Remove the check mark from this area to hide all of the data in the display window.  See shortcut menu options...
Data Selection: Open the Data Selection dialog box and add or remove data objects from the scene tree.
Show All: Show all of the in the data items from the scene tree in the display window.
Hide All: Hide all of the in the data items from the scene tree in the display window.
Add Folder: Add a 3D Seismic, 2D Seismic, Horizon, Fault, Grid, Well, or Culture folder to the scene. After you ad the folder you can rename it so you can easily identify its contents. Once you add a folder it will be available in the Data Selection dialog box and you can add data objects to the folder.
Seismic 3D Folder: Right click on this item to access the shortcut menu and add or remove seismic files from the display.
See shortcut menu options...
Data Selection: Open the Data Selection dialog box and add or remove data objects from the scene tree.
Show All: Show all views of all seismic volumes (inline, crossline, arbline, Z-slice) in the display window.
Hide All: Hide all views of all seismic volumes (inline, crossline, arbline, Z-slice) in the display window.
Remove All: Remove all of the seismic data from the scene. The empty folder will remain associated with the scene.
Remove Folder: Remove the folder and all of the data within it from the scene.
3D Seismic File Folder: Right click on the name of the seismic file to select which datasets (versions) you want to display. See shortcut menu options...
Go to Line: Center the display on the seismic data.
Remove Line: Remove the seismic data from the scene.
Select Datasets: Open the Select Datasets dialog box to select the which versions of the seismic file you want available in your scene tree.
3D Seismic Dataset: Select a seismic dataset and then change its properties in the Object Properties dialog box, including the inline, crossline and vertical postings. Right click on the seismic volume to access the shortcut menu. See shortcut menu options...
Go to Dataset: Center the display on the seismic dataset.
Remove Dataset: Remove the seismic volume from the scene.
Add Inline: Add an inline to the scene. This will add an inline from the center of the volume. Once added, select the inline in the scene tree and change its properties from the Object Properties dialog box. Use the Slider Toolbar to change the inline being displayed, and the Colorbar Toolbar to change the palette.
Add Crossline: Add a crossline to the scene. This will add a crossline from the center of the volume. Once added, select the crossline in the scene tree and change its properties from the Object Properties dialog box. Use the Slider Toolbar to change the inline being displayed, and the Colorbar Toolbar to change the palette.
Add Arbline: Add an arbline to the display. Once selected, click on the seismic display to begin drawing an arbitrary line, click again to add an inflection point, and right click to add an endpoint and end the selection. Once added, select the arbline in the scene tree and change its properties from the Object Properties dialog box. Use the Colorbar Toolbar to change the palette.
Add Z-slice: Add a horizontal slice to the display. This will add a slice from the center of the volume. Once added, select the arbline in the scene tree and change its properties from the Object Properties dialog box. Use the Slider Toolbar to change the slice being displayed, and the Colorbar Toolbarto change the palette.
Add Horizon Slice:Add a slice created from a horizon surface to the display. Once added, select the horizon slice in the scene tree and then select the horizon to use, and change its properties from the Object Properties dialog box. Use the Slider Toolbar to move the slice vertically through the volume, and the Colorbar Toolbar to change the palette. Note: Until you select a Horizon in the Object Properties dialog box, the slice will not appear on the display.
Store Dataset in Cache: Load the seismic volume into local memory. To determine how much memory can be used to cache seismic volumes, open the Application Configuration settings from the File menu.
Seismic 2D Folder: Right click on this item to access the shortcut menu and add or remove seismic files from the display.
See shortcut menu options...
Data Selection: Open the Data Selection dialog box and add or remove data objects from the scene tree.
Show All: Show all views of all 2D seismic lines in the display window.
Hide All: Hide all views of all 2D seismic lines in the display window.
Remove All: Remove all of the 2D seismic data from the scene. The empty folder will remain associated with the scene.
Remove Folder: Remove the folder and all of the data within it from the scene.
2D Seismic Line: Right click on the name of the seismic file to select which datasets (versions) you want to display. See shortcut menu options...
Go to Line: Center the display on the seismic data.
Remove Line: Remove the seismic data from the scene.
Select Datasets: Open the Select Datasets dialog box to select the which versions of the 2D seismic line you want available in your scene tree.
2D Seismic Dataset: Select a seismic dataset and then change its properties in the Object Properties dialog box, including the inline, crossline and vertical postings. Right click on the seismic volume to access the shortcut menu. See shortcut menu options...
Go to Dataset: Center the display on the seismic dataset.
Remove Dataset: Remove the seismic volume from the scene.
Store Dataset in Cache: Load the seismic volume into local memory. To determine how much memory can be used to cache seismic volumes, open the Application Configuration settings from the File menu.
Horizons Folder: Right click on this item to access the shortcut menu and add or remove horizons from the display. When a horizon has been picked on 2D lines you will also have the option to turn the horizon display on or ff on individual 2D lines. See shortcut menu options...
Data Selection: Open the Data Selection dialog box and add or remove data objects from the scene tree.
Show All: Show all horizons within the folder in the display window.
Hide All: Remove all horizons within the folder from the display window.
Remove All: Remove all of the horizons within the folder from the scene. The empty folder will remain associated with the scene.
Remove Folder: Remove the folder and all of the data within it from the scene.
Horizon: Select a horizon to change its properties in the
Object Properties dialog box, including scaling, smoothing, and opacity. Right click on the horizon to access the shortcut menu. Below the horizon name in the tree you will see the names of all of the seismic volumes with which it is associated. Use these to hide the horizon on individual seismic volumes.
See shortcut menu options...Go to Horizon: Center the display on the horizon.
Remove Horizon: Remove the horizon from the scene.
Faults Folder: Right click on this item to access the shortcut menu to add or remove faults from the display. See shortcut menu options...
Data Selection: Open the Data Selection dialog box and add or remove data objects from the scene tree.
Show All: Show all faults within the folder in the display window.
Hide All: Remove all faults within the folder from the display window.
Remove All: Remove all of the fault data within the folder from the scene. The empty folder will remain associated with the scene.
Remove Folder: Remove the folder and all of the data within it from the scene.
Grids Folder: Right click on this item to access the shortcut menu to add or remove grids from the display. See shortcut menu options...
Data Selection: Open the Data Selection dialog box and add or remove data objects from the scene tree.
Show All: Show all grids within the folder in the display window.
Hide All: Remove all grids within the folder from the display window.
Remove All: Remove all of the grid data within the folder from the scene. The empty folder will remain associated with the scene.
Remove Folder: Remove the folder and all of the data within it from the scene.
Grid: Select a grid to change its properties in the Object Properties dialog box, including the color palette and opacity. Right click on the grid to access the shortcut menu. See shortcut menu options...
Go to Grid: Center the display on the grid.
Remove Grid: Remove the grid from the scene.
Wells Folder: Right click on this item to access the shortcut menu to add or remove wells from the display.
Select a well to change the properties for all wells. Note: You cannot change the properties of individual wells. See shortcut menu options...
Data Selection: Open the Data Selection dialog box and add or remove data objects from the scene tree.
Show All: Show all wells within the folder in the display window.
Hide All: Remove all wells within the folder from the display window.
Remove All: Remove all of the well data within the folder from the scene. The empty folder will remain associated with the scene.
Remove Folder: Remove the folder and all of the data within it from the scene.
Well: Right click on a well to access the shortcut menu. See shortcut menu options...
Go to Well: Center the display on the well.
Remove Well: Remove the well from the scene.
Culture Folder: Right click on this item to access the shortcut menu to add or remove culture objects from the display.
Select this folder to change the global properties for the objects within the folder. See shortcut menu options...
Data Selection: Open the Data Selection dialog box and add or remove data objects from the scene tree.
Show All: Show all culture objects within the folder in the display window.
Hide All: Remove all culture objects within the folder from the display window.
Remove All: Remove all of the culture data within the folder from the scene. The empty folder will remain associated with the scene.
Remove Folder: Remove the folder and all of the data within it from the scene.
Culture Object: Select a culture object to change its properties in the Object Properties dialog box, including the color and opacity. Right click on the culture object to access the shortcut menu. See shortcut menu options...
Go to Culture Layer: Center the display on the culture layer.
Remove Culture Layer: Remove the culture layer from the scene.
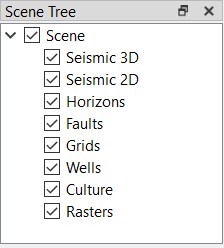 The Scene Tree dialog box is used to load data, and quickly turn data items on and off. When you open 3D Visualizer for the first time, the tree will display a data folder for each data type, but the folders will not contain any data. Right click on any folder and select Data Selection to open the Data Selection dialog box and add or remove data objects from the scene tree. You can create multiple folders for each data type and group data objects to more easily turn them on and off, and manage their properties.