Map View Tools: Define New Cross Section
 The Define New Cross Section dialog box is used to select properties and behavior when you are graphically creating a new cross section in Map View. To open the Define New Cross Section dialog box, from the Map View Cross Section Display Controls dialog box, click
  , or from the Actions toolbar in the 3D View window, click the Define Cross Section icon
 ![]() .
.
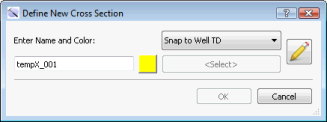
Enter Name and Color: Enter a name for the cross section, or modify the default name. Click on the color field to open the Color Table and select or change the color that will be applied to the line representing the cross section in the 3D View and Map View windows.
Snap Mode: Select the picking behavior for creating your cross section. You can change the snap mode as you are creating your cross section.
XY Node:Place cross section nodes at the exact location of your cursor. In Section View, wells are projected onto the cross section based on their proximity, as defined by the distance value in the Projection buffer in the Map View Cross Section Display Controls dialog box.
Snap to Well TD: Place the cross section node at the TD location of the well closest to your cursor location.
Snap to KB Follow Well Path: Click on a deviated well to create a cross section along a well bore, starting at the KB location.
Snap to TD Follow Well Path: Click on a deviated well to create a cross section along a well bore, starting at the TD location.
Snap to Pick: Select a surface. As you create your cross section the node will be placed at the XY location of the surface along the well bore for the well closest to your cursor location.
![]() Create Cross Section Nodes: When you make changes in the dialog box as you creating a cross section, click this icon to return continue selecting cross section node locations on the map.
Create Cross Section Nodes: When you make changes in the dialog box as you creating a cross section, click this icon to return continue selecting cross section node locations on the map.
- Enter a name for the cross section and select a color.
- Specify the picking behavior, selecting a surface when required.
- Using your cursor (
 ), click on the map to place cross section nodes. The cross section nodes will be placed using the selected Snap Mode.
— MORE INFORMATION

|
Copyright © 2020 | SeisWare International Inc. | All rights reserved |