Well Tools: Image Depth Calibrator
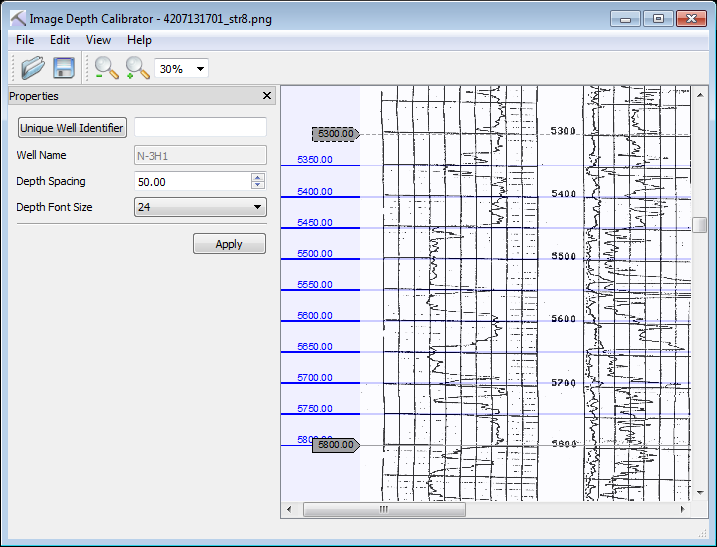
The Image Depth Calibrator is used to associate raster logs, core descriptions, and photographs, with wells in your project, and then depth calibrate the images. These images can then be displayed in a template, and used to interpret data. To open the Image Depth Calibrator, in the 3D View window, from the Tools menu select Image Depth Calibrator.
Wells are calibrated by placing markers at specific locations and then entering the corresponding measured depth value. You can place a series of marker along the
Menus
A series of menus are available at the top of the dialog box to access additional tools and options.
File Menu: Use the File menu to open and save images. ![]() See File menu options...
See File menu options...
Edit Menu: Use the Edit menu to add and delete markers. ![]() See Edit menu options...
See Edit menu options...
View Menu: Use the View menu to zoom in and out on the image. ![]() See View menu options...
See View menu options...
Toolbars
There are three toolbars you can use when depth calibrating your image.
File Toolbar: Use the File toolbar to open and save images. ![]() See File toolbar options...
See File toolbar options...
View Toolbar: Use the View toolbar to zoom in and out on the image, or enter a custom zoom level. ![]() See View toolbar options...
See View toolbar options...
Properties Toolbar: Use the Properties toolbar to select the well with which to associate the image, and specify the depth spacing and font size. ![]() See Properties toolbar options...
See Properties toolbar options...
- Click
 and select an image file. The image will appear in the window.
 - Click
 and select the well with which to associate the image. Note: After you save the file you can select another well, and save the same image with that well.
 -
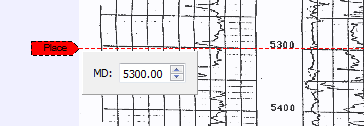 Double click on the image at a known depth. A red marker will appear along with a dialog box.
 - Enter the measured depth value of the marker into the dialog box.
- Click and drag the red marker to fine tune its placement on the image.
- Double click on the red marker to place the marker on the image.
- Place another marker, repeating steps 3 to 7. After placing the second marker, depth markings will appear at the intervals specified by the Depth Spacing field.
- Continue placing markers until the entire image has been calibrated.
- Click
 .
.
You can display a calibrated image file by adding an image panel to a well template from the Well View window.
- From the Well View window, open the Template Edit Controls dialog box.
- On the Tracks tab, from the Track Type selector, choose Image.
- Click
 .
. - Adjust the track width if desired.
- Click
 . Note: For any wells that don't have an associated image this track will appear blank.
— MORE INFORMATION

|
Copyright © 2020 | SeisWare International Inc. | All rights reserved |