Drilling Target Identifier

In Drilling Target Identifier mode you can create proposed well locations, and plan wells. The Drilling Target Identifier dialog box will open immediately after clicking the Drilling Target Identifier icon (![]() ). Some fields can be edited, and others are informational and will update automatically as you edit your well plan.
). Some fields can be edited, and others are informational and will update automatically as you edit your well plan.
Note: You must look at your cross section using Distance Spacing to use this tool in the Cross Section View window.
Name: The name of the well. Changing this name will change the name at the top of the dialog box.
Status: Select a status from the list. By default this will read Target Well.
Operator: Enter the name of the operator.
Field: Enter the name of the field.
X/Y/KB: When you open the dialog box, these fields will contain zeros. As you place inflection nodes, these will reflect the location of the last node.
 Log Info: Open the Well Log Information window to view the logs associated with the current well.
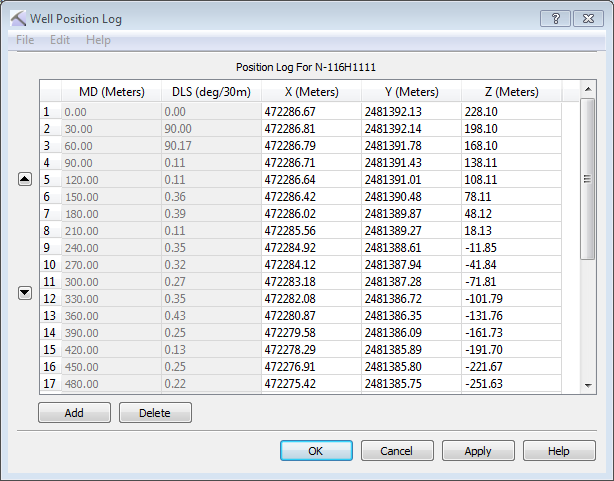
 Well Position Log: Open the Well Position Log window to view and edit planned well inflection nodes.
 Add: Add a row to the data table, and manually enter X, Y, and Z values. Use the up and down arrows (
 /
/ ) to place the new information in the right sequential location.
 Delete: Delete the selected rows from the data table.
- Click on the cross section to start the plan.
- Continue clicking to place additional inflection nodes. The information in the dialog box will reflect the changes to the well plan.
- Right click to finish the well plan.
- Click
 to save the well plan to the database.
In 3D View you must place nodes on a visible surface, otherwise the XYZ location can't be determined. One method is to display a seismic backdrop on a cross section. When one is not available, you can create the plan in the Cross Section View window and see the changes reflects in the 3D View window.
- Click on a visible object, for example a location on the seismic backdrop, to start the plan.
- Continue clicking to place additional inflection nodes. The information in the dialog box will reflect the changes to the well plan.
- Right click to finish the well plan.
- Click to save the well plan to the database.
— MORE INFORMATION

|
Copyright © 2020 | SeisWare International Inc. | All rights reserved |